When it comes to maintaining comfortable temperatures and protecting your plumbing system, proper floor insulation plays a crucial role in raised house construction. Many homeowners turn to resources like H Decor Ideas for guidance on home improvement projects, and insulating raised floors ranks among the most important tasks for energy efficiency and pipe protection.
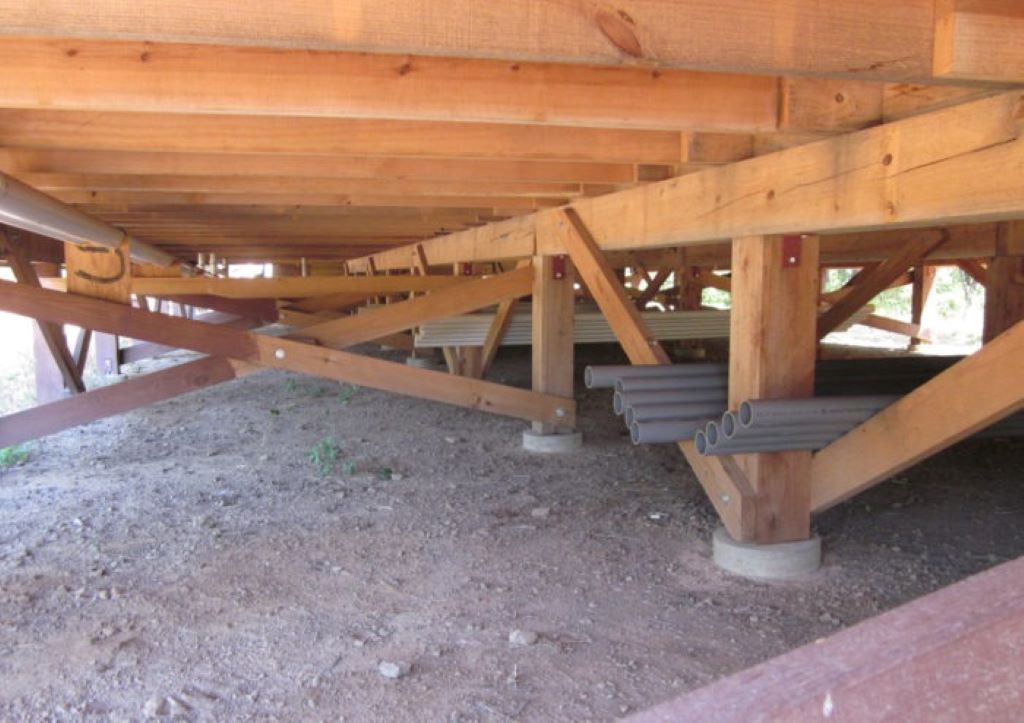
Raised floor construction offers numerous advantages, including easier access to utilities and improved ventilation. However, without adequate insulation, these benefits can quickly turn into problems. Cold air flowing beneath your home can freeze pipes, increase heating costs, and create uncomfortable drafts throughout your living space.
Understanding the correct insulation to go behind shower and under a raised house becomes essential for any homeowner dealing with elevated foundation systems. The right approach protects both your comfort and your investment while preventing costly repairs down the road.
Why Raised Floor Insulation Matters
Raised floor insulation serves multiple purposes beyond simple temperature control. Without proper insulation, your home loses significant amounts of heated or cooled air through the floor assembly. This energy loss translates directly into higher utility bills and reduced indoor comfort levels.
Plumbing systems face particular challenges in raised floor applications. Water lines running beneath the house remain exposed to outdoor temperatures, making them vulnerable to freezing during cold weather. Frozen pipes can burst, causing extensive water damage and expensive repairs.
Additionally, uninsulated raised floors often develop moisture problems. Condensation forms when warm indoor air meets cold surfaces, potentially leading to mold growth and structural damage over time. Proper insulation creates a thermal barrier that prevents these temperature differentials.
Choosing the Right Insulation Materials
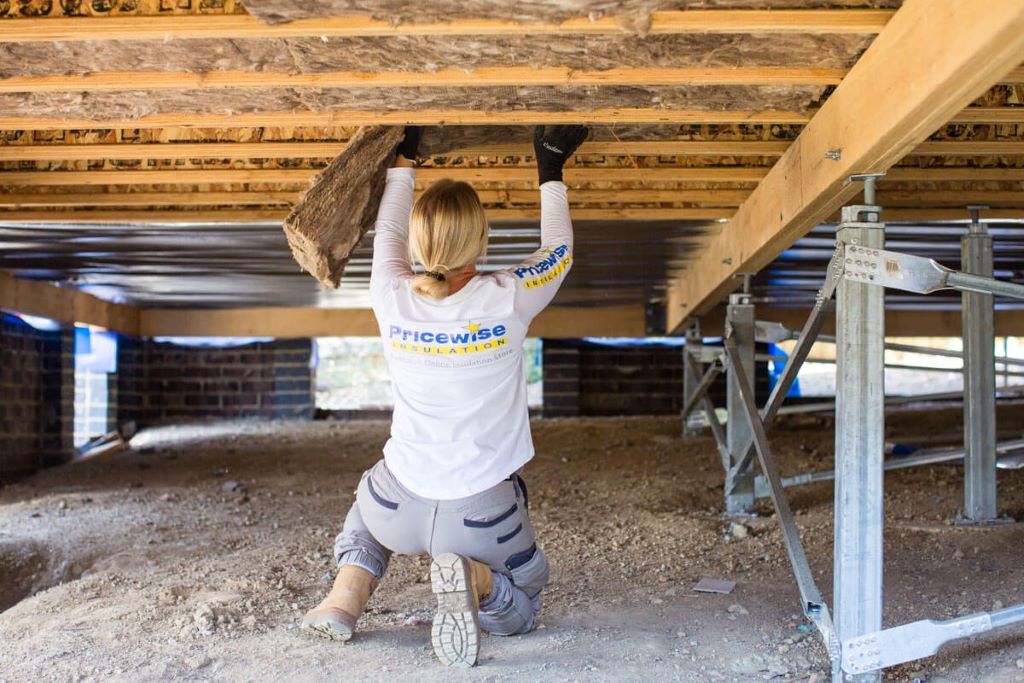
Several insulation types work well for raised floor applications, each offering distinct advantages and limitations. Fiberglass batts remain the most popular choice due to their affordability and ease of installation. These flexible panels fit between floor joists and provide excellent thermal resistance when properly installed.
Rigid foam board insulation offers superior moisture resistance and higher R-values per inch compared to fiberglass. This material works particularly well in areas prone to humidity or moisture exposure. However, rigid foam costs more and requires careful cutting for proper fit.
Spray foam insulation provides the best air sealing properties and highest R-values. Professional installation ensures complete coverage and eliminates thermal bridging. The higher upfront cost often pays for itself through improved energy efficiency and comfort.
Reflective insulation systems use aluminum foil to reflect radiant heat rather than absorbing it. These systems work best in hot climates where cooling costs dominate energy bills. Reflective barriers require air gaps to function properly and may not provide adequate thermal resistance in colder regions.
Installation Techniques for Different Areas
The installation approach varies depending on the specific area being insulated. Standard floor areas typically use batts or rolls placed between joists with the vapor barrier facing the heated space. Proper support prevents sagging while maintaining the insulation’s effectiveness.
Bathroom and kitchen areas require special attention due to increased moisture levels. Using moisture-resistant materials and proper vapor barriers prevents water damage and maintains insulation performance. These areas often benefit from rigid foam or closed-cell spray foam applications.
Around plumbing penetrations, careful sealing prevents air leakage that reduces insulation effectiveness. Expanding foam works well for sealing small gaps, while larger openings may require custom-cut pieces and additional weatherstripping.
Special Considerations for Plumbing Protection
Protecting water lines requires strategic insulation placement and sometimes supplemental heating elements. The correct insulation to go behind shower and under a raised house involves creating continuous thermal protection around all plumbing components.
Supply lines need insulation along their entire length, paying special attention to areas where pipes approach exterior walls. Return lines also benefit from insulation, though freeze protection becomes less critical for these components.
Drain lines require different considerations since they don’t typically carry pressurized water. However, trap seals can freeze in extreme cold, potentially allowing sewer gases to enter the home. Insulating drain lines and maintaining adequate heat helps prevent these problems.
Water heaters located under raised floors need special insulation strategies. Surrounding the unit with insulation while maintaining proper clearances improves efficiency and prevents heat loss to the outdoor environment.
Vapor Barrier Installation and Placement
Proper vapor barrier installation prevents moisture problems that can damage insulation and structural components. The barrier’s location depends on climate conditions and heating/cooling patterns throughout the year.
In heating-dominated climates, vapor barriers belong on the warm side of the insulation assembly. This typically means installing barriers facing the interior of the home. Improper placement can trap moisture within the insulation, reducing its effectiveness.
Mixed climates present challenges since moisture drive changes direction seasonally. Smart vapor retarders offer variable permeability that adapts to changing conditions. These advanced materials cost more but provide superior moisture management.
Installation details matter significantly for vapor barrier effectiveness. All seams require proper sealing with appropriate tape or adhesive. Penetrations around pipes and electrical components need careful attention to maintain the barrier’s integrity.
Common Installation Mistakes to Avoid
Many installation problems stem from inadequate air sealing around the insulation system. Gaps and cracks allow air movement that reduces thermal performance and can cause moisture problems. Careful attention to sealing details prevents these issues.
Compressing insulation reduces its R-value and effectiveness. Overstuffing batts into cavities or applying excessive pressure during installation eliminates the air pockets that provide thermal resistance. Proper sizing and gentle installation maintain optimal performance.
Failing to support insulation properly leads to sagging and gaps over time. Wire mesh, insulation supports, or other retention systems keep materials in place for long-term effectiveness. Gravity eventually defeats improperly supported installations.
Ignoring manufacturer specifications for installation clearances and procedures often results in poor performance. Each insulation type has specific requirements for proper installation. Following these guidelines ensures optimal results and maintains warranty coverage.
Maintenance and Long-Term Performance
Regular inspection helps maintain insulation performance over time. Look for signs of settling, moisture damage, or pest intrusion that can compromise effectiveness. Early detection allows for corrections before problems become extensive.
Rodents and insects can damage insulation systems by creating nests or tunnels through the material. Pest control measures and proper sealing help prevent these problems. Damaged areas require replacement to maintain thermal performance.
Moisture problems show up as discoloration, odors, or visible mold growth. Address water sources immediately and replace affected insulation. Continuing to use wet or contaminated insulation creates health risks and reduces effectiveness.
Settling occurs naturally over time, particularly with loose-fill insulations. Adding material to maintain proper depth restores thermal performance. Keep records of installation dates and R-values to guide maintenance decisions.
Cost Considerations and Return on Investment
Insulation costs vary significantly based on material choice, installation complexity, and regional labor rates. DIY installation reduces costs but requires proper technique and safety precautions. Professional installation ensures optimal results but increases initial expense.
Energy savings typically offset insulation costs within several years through reduced heating and cooling bills. Higher R-value installations cost more initially but provide greater long-term savings. Consider local energy costs when evaluating different options.
Preventing frozen pipes saves potentially thousands of dollars in repair costs and water damage. This protection alone often justifies insulation expenses in cold climates. Insurance companies may offer discounts for properly insulated homes.
Property values benefit from proper insulation through improved energy efficiency ratings and comfort levels. Home buyers increasingly consider energy performance when making purchasing decisions. Quality insulation systems add marketable value to properties.
Conclusion
Properly insulating raised floors protects plumbing systems while improving energy efficiency and indoor comfort. The correct insulation to go behind shower and under a raised house requires careful material selection, proper installation techniques, and attention to moisture management details.
Success depends on understanding the unique challenges of raised floor construction and selecting appropriate materials for each application. Whether choosing DIY installation or professional services, following manufacturer guidelines and building code requirements ensures optimal performance.
Regular maintenance preserves insulation effectiveness over time while preventing costly problems. The investment in quality insulation systems pays dividends through reduced energy costs, improved comfort, and protection of valuable plumbing components.
Frequently Asked Questions
What R-value should I use for raised floor insulation? Most building codes require R-13 to R-19 for raised floor applications, but R-25 or higher provides better energy savings in extreme climates. Consider local climate conditions and energy costs when selecting R-values.
Can I install raised floor insulation myself? DIY installation is possible with proper safety equipment and technique. However, spray foam and complex moisture barrier systems typically require professional installation for optimal results and warranty coverage.
How do I prevent pipes from freezing under an insulated raised floor? Combine continuous insulation coverage with pipe insulation and heat tape in extreme cold areas. Maintain some heated air circulation under the floor and seal all air leaks that allow cold air infiltration.
What happens if moisture gets into my floor insulation? Wet insulation loses effectiveness and can develop mold or mildew problems. Remove and replace affected materials immediately, then address the moisture source to prevent recurrence.
How long does raised floor insulation typically last? Quality insulation materials properly installed can last 20-30 years or more. Regular inspection and maintenance help identify problems early and extend service life significantly.
Read More:

