Roof tiles offer a classic aesthetic appeal, are known for their exceptional durability, and provide excellent protection for your home. Installing roof tiles might seem like a job best left to professionals, but with the right preparation, tools, and a bit of know-how, it’s well within the realm of skilled DIYers.
Preparation: Understanding Your Project
- Tile Choice: Clay and concrete are the most common materials. Clay tiles provide a traditional look and unmatched longevity, while concrete tiles are generally more affordable and come in a wider array of colors and styles. Consider factors like your home’s style, climate, and budget when choosing your tiles.
- Underlayment: This protective layer between the tiles and the roof deck is crucial. Synthetic underlayments are a good choice for most projects due to their strength and water resistance.
- Roof Structure: Before starting, ensure your roof framing is sturdy enough to support the weight of tiles. A structural engineer can help you assess this if in doubt.
- Safety: Roofing work is inherently risky. Invest in high-quality harnesses, fall protection, and roof brackets, and enlist a helper. Follow all relevant safety codes.
Tools and Supplies
Gather the following essentials before you begin:
- Tiles: Calculate the quantity needed based on your roof’s area
- Underlayment
- Roof Battens: Wooden strips to support the tiles
- Roofing Nails and Clips
- Hammer, Chalk Line, Measuring Tape
- Tile Cutter
- Safety Equipment
Step-by-Step Installation

- Install Underlayment: Roll the underlayment horizontally across the roof, starting from the bottom. Overlap each layer by a few inches and secure it with nails or staples, working up towards the ridge.
- Install Battens: Determine the proper batten spacing for your chosen tiles by measuring their “gauge” (exposed portion). Mark the spacing, starting from the bottom edge of the roof, and install battens horizontally using roofing nails.
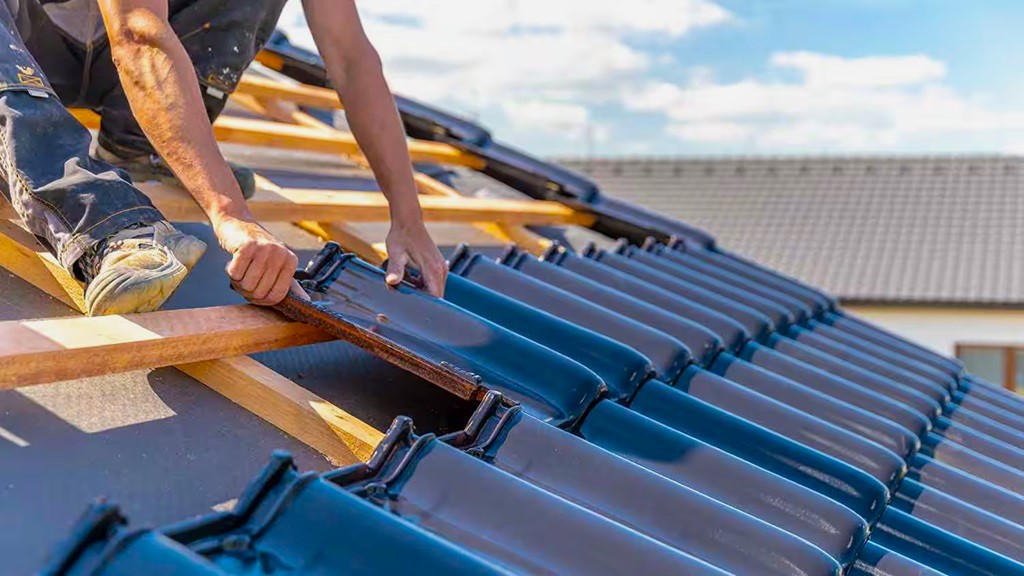
- Laying the Tiles: Start tiling in the bottom corner, working your way up and across the roof. Each tile will usually interlock with the adjacent ones. Secure as instructed by the manufacturer, either directly with nails or using special clips.
- Cutting Tiles: For edges and around obstructions, you’ll need to cut tiles. Use a wet saw or angle grinder with a diamond blade for clean cuts.
- Hips and Ridges: These areas require specialized tiles. Hip tiles form the angled joints where two slopes meet, while ridge tiles cap the roof’s peak. Install these according to the manufacturer’s instructions.
- Flashing: Install metal flashing around penetrations like chimneys or vents to prevent leaks. Ensure proper integration with the tiles.
Related: Metal Roof Issues
Important Considerations
- Tile Overlap: Each tile usually requires a specific overlap with the ones above and below. Check the manufacturer’s specifications for the exact amount.
- Climate: In areas with high winds or heavy snowfall, additional fastening methods for your tiles may be necessary.
- Local Codes: Always adhere to local building codes. Some jurisdictions have specific requirements for roof tile installation, including underlayment, fastening, and ventilation.
- Ventilation: Ensure proper roof ventilation to prevent moisture buildup and prolong the lifespan of your roof.
Advanced Considerations for Knowledgeable DIYers
- Valley Installation: Valleys (where two roof slopes meet to form an inward angle) require meticulous flashing and tile installation to prevent leaks. Consider woven or closed valley installation techniques.
- Complex Roof Shapes: If your roof has dormers, multiple slopes, or intricate angles, installing tiles will become significantly more challenging. Know your limits and consider hiring a roofing contractor if the scope becomes unmanageable.
When to Call a Professional
While installing roof tiles yourself can save money, there are instances where hiring a roofer is the wiser choice:
- Steep Roofs: Excessively steep roof pitches significantly increase the risk. If you are uncomfortable with heights, it’s best to leave this to a pro.
- Second Story or Higher: The complexity and danger of working on a multi-story home should not be underestimated.
- Unsure about your skills: If at any point you feel unsure about any stage of the process, calling on qualified roofers is always the safest option.
With careful planning, the right tools, and a commitment to safety, installing a beautiful, long-lasting tile roof is within reach of the dedicated DIYer.


