Do you often find your mops and brooms scattered all over the place, making your home look cluttered and unorganized? You’re not alone. Many of us struggle with keeping our cleaning tools in order, but fear not! In this guide, we’ll walk you through the simple yet effective art of hanging mops and brooms, transforming your cleaning area from chaos to cleanliness. So, let’s get started and make your cleaning routine a breeze!
Why Should You Hang Your Mops and Brooms?
Before diving into the “how,” let’s talk about the “why.” Why should you bother hanging your mops and brooms? Well, it’s all about convenience and cleanliness:
- Space Saving: When you hang your cleaning tools, you free up valuable floor space. Say goodbye to tripping over broomsticks or knocking down mops while searching for the right tool.
- Improved Lifespan: Hanging your mops and brooms properly helps maintain their shape and extends their lifespan. No more frayed bristles or bent handles.
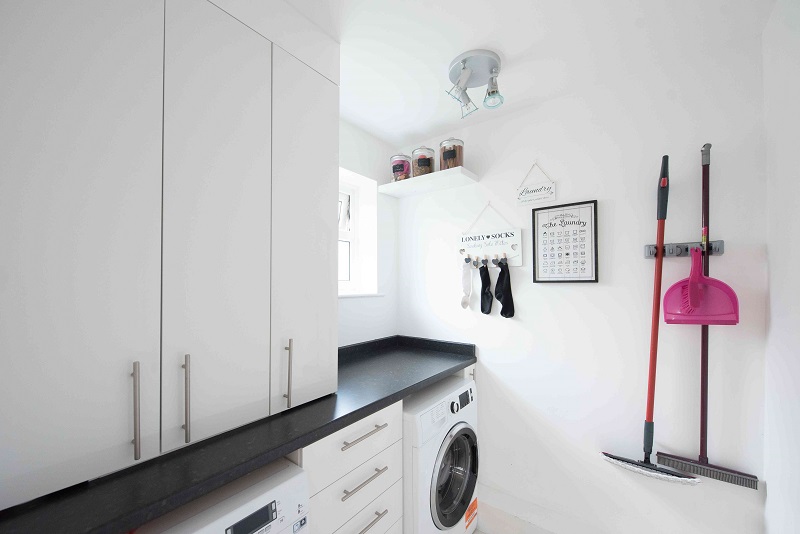
- Aesthetic Appeal: Organized cleaning tools can give your space a neat and tidy look. It’s a small change that can make a big difference in the overall appearance of your home.
Now that you’re convinced, let’s roll up our sleeves and learn how to hang mops and brooms effectively.
Step 1: Gather Your Supplies
Before you start hanging your cleaning tools, it’s essential to gather the necessary supplies. You won’t need anything fancy; just a few basic items will do the trick:
- Broom and Mop Holders or Hooks: These are the heroes of our organization’s mission. You can find them at most hardware stores, and they come in various styles and materials.
- Screws and Wall Anchors: Depending on your wall type, you might need some screws and wall anchors. These ensure a sturdy and secure hold.
- A Power Drill (optional): If you have a power drill, it can make the installation process faster and easier. However, you can also use a regular screwdriver if you don’t have one.
- A Level: To ensure that your cleaning tools hang straight and look aesthetically pleasing.
Once you have all your supplies gathered, it’s time to move on to the next step.
Step 2: Choose the Right Location
Now, you might be tempted to just grab your broom and mop and start hammering hooks into any available wall space, but hold on a second! Choosing the right location is crucial for both functionality and aesthetics.
Questions to Consider:
- Where do you usually store your cleaning tools? Ideally, you want them close to where you use them the most.
- Is there enough wall space available? You don’t want to overcrowd the area.
- Can you reach the hooks easily? You want your mops and brooms to be easily accessible.
- Is there enough clearance for the tools? Make sure the handles won’t touch the floor or obstruct anything.
Once you’ve found the perfect spot, you’re ready to move on.
Step 3: Install Your Broom and Mop Holders or Hooks
Now, it’s time to put those broom and mop holders or hooks to good use. Here’s a simple step-by-step process:
Mark Your Locations
Use a pencil or a piece of chalk to mark where you’ll be placing your holders or hooks. Make sure they are evenly spaced and level. You don’t want your cleaning tools hanging at odd angles.
Drill or Screw In Your Holders or Hooks
If you’re using hooks, this step is relatively straightforward. Just screw them into the wall using the markings you made. If you’re using holders that require screws and anchors, follow these steps:
- Drill a hole for the wall anchor, if needed. Be sure to choose the right drill bit size based on the anchor’s instructions.
- Insert the wall anchor into the hole.
- Position the holder over the anchor and secure it to the wall using screws.
Check for Stability
Give your newly installed holders or hooks a gentle tug to ensure they’re securely attached to the wall. You want them to stay put when you hang your cleaning tools on them.
Hang Your Mops and Brooms
With your holders or hooks securely in place, it’s time for the fun part – hanging your mops and brooms! Here’s how to do it:
Position Your Tools
Start by placing your mops and brooms in the holders or hooks. Make sure the bristles of the broom or mop are facing downward. This prevents them from collecting dust and keeps your cleaning tools in better condition.
Organize Them Thoughtfully
Consider the order in which you hang your cleaning tools. Place the ones you use most frequently within easy reach. It’s like arranging your closet – you wouldn’t bury your favorite shoes at the back, right?
Avoid Overcrowding
While it’s tempting to hang all your cleaning tools in one spot, avoid overcrowding. Give each tool its own space to prevent them from clashing and making it hard to grab the one you need.
Maintain and Care for Your Hanging Cleaning Tools

Congratulations! Your mops and brooms are now neatly hanging on your wall, making your cleaning routine smoother. But, like anything else, they require some care and maintenance to ensure they stay in good shape.
Regularly Clean Your Cleaning Tools
It might sound ironic, but your cleaning tools need cleaning too. Give your broom’s bristles and your mop’s head a good shake or tap to remove dust and debris after each use. Periodically, wash the mop head and replace broom heads as needed.
Inspect for Wear and Tear
Check your mops and brooms for any signs of wear and tear. Are the bristles frayed? Is the handle wobbly? If so, it’s time for some maintenance. Replace or repair them to keep your tools in top condition.
Keep Hooks or Holders Clean
Dust and dirt can accumulate on your hooks or holders over time. Every once in a while, take a damp cloth and wipe them clean. This not only keeps them looking nice but also ensures a secure grip on your cleaning tools.
Adjust as Needed
As your cleaning routine or tools change, feel free to adjust the placement of your holders or hooks. The beauty of this system is its flexibility.
FAQs
Now that you’re a pro at hanging mops and brooms, let’s address some common questions you might have:
- Can I hang my mop and broom holders inside a closet?
Absolutely! Hanging your cleaning tools inside a closet can be a great space-saving solution. Just make sure there’s enough clearance for your tools to hang freely without getting tangled.
- What if I have a small space with limited wall space available?
In small spaces, every inch counts. Look for creative spots to hang your cleaning tools, such as the back of a pantry door or the inside of a cabinet door. You can also opt for compact and multi-functional holders to make the most of your limited space.
- Are there alternatives to wall-mounted holders and hooks?
Yes, there are alternatives like freestanding mop and broom organizers or rolling carts. These can be particularly useful if you have a lot of cleaning tools or if you frequently move them from room to room.
- Can I hang other cleaning tools like dusters and vacuum attachments using the same method?
Absolutely! The same principles apply. Use hooks or holders suitable for the size and weight of the tool you’re hanging. The key is to keep it organized and accessible.
- What if I have textured or brick walls? Can I still hang my cleaning tools?
Yes, you can. There are wall anchors designed specifically for textured or brick walls. These anchors provide a secure grip, allowing you to hang your cleaning tools even on challenging surfaces.
Conclusion
So, there you have it – the art of hanging mops and brooms demystified. It’s a simple yet highly effective way to keep your cleaning area organized, and it can make a world of difference in your daily routine. With a little effort and the right tools, you can transform your cluttered cleaning corner into a tidy and functional space. Happy cleaning!