A clean faucet aerator is the small part you notice only when something goes wrong. The spray turns crooked, the stream slows to a trickle, or a white crust creeps around the rim. You twist the tip loose and wonder what you are looking at.
Quick answer: Unscrew the aerator, take out the screen and insert, and rinse them under warm water. Soak the parts in white vinegar for 30 to 60 minutes if you see mineral scale, then scrub gently with an old toothbrush. Reassemble and run the tap for a few seconds. Cleaning every three to six months keeps flow steady and removes the grit that collects behind the screen.
This guide explains what an aerator does, why a dirty one costs you money and water quality, and the routine that keeps it working. You will also see the mistakes that damage aerators and the answers to the questions people ask most.
What is clean faucet aerator?
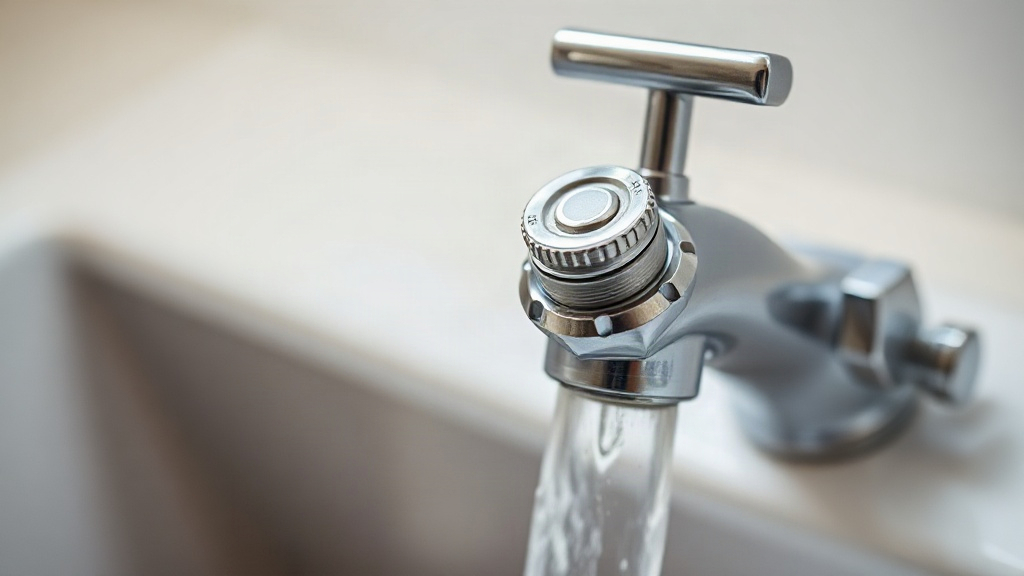
An aerator is the small screw-on fitting at the tip of most kitchen and bathroom faucets. Inside sit a few layers: a wire mesh screen, a plastic or metal insert, and a rubber washer. Water passes through these layers and mixes with air, which makes the stream feel fuller than it is.
That mixing is the whole point. A good aerator can cut flow from roughly 2.2 gallons per minute (gpm) on older fixtures to about 1.5 gpm or even 1.0 gpm, depending on the model. You still get a splash-free stream that rinses your hands and fills a pot without spraying across the counter.
What “clean” actually means
A clean aerator is free of three things:
- Mineral scale, the chalky white buildup of calcium and magnesium left when hard water evaporates.
- Sediment, tiny particles of sand, rust, or pipe debris trapped by the screen.
- Biofilm, the slippery film where bacteria and organic matter settle in a damp, dark space.
A quick rinse removes loose grit. Scale and biofilm need a soak, because they bond to the surface and will not wash away on their own.
Where the dirt comes from
Municipal water carries trace minerals and the occasional burst of sediment when a main is repaired. Well water often brings more iron and hardness. Older galvanized pipes shed rust flakes that land on the aerator screen. In each case, the aerator acts as a filter, which is useful until the trapped material starts to restrict flow.
How dirty aerators behave
The symptoms are easy to read once you know them. A stream that sprays sideways usually means a crooked or clogged insert. A sudden drop in pressure points to a blocked screen. Bits of white grit in a glass of water mean scale is breaking loose upstream of the aerator. Whistling or sputtering means air is not mixing properly. Any of these signals means it is time to take the fitting off and look.
Why clean faucet aerator matters
A neglected aerator is a slow, quiet drain on your plumbing. The restriction builds gradually, so you rarely notice it until the flow is half of what it should be. Here is what that costs you in practice.
Water and energy savings
Flow rate drives consumption. If a scaled aerator forces you to run the tap twice as long to rinse a plate or fill a pitcher, you use more water than a working low-flow model would. Hot water adds an energy bill on top of the water bill. Keeping the screen clear lets the aerator do its intended job at its rated flow.
Better water quality at the tap
Everything in your water passes through that screen. A dirty one holds sediment against the mesh, and a damp, nutrient-rich layer is exactly where biofilm forms. Cleaning removes the buildup before it affects taste or smell. For anyone with a compromised immune system, a clean tap fitting is a simple hygiene habit worth keeping.
Your faucet aerator catches what the pipes deliver. A cloudy stream or a metallic taste may come from the aerator, not the water supply, so check it before you blame the utility.
Protecting the faucet itself
Debris that passes a clogged aerator can scratch the cartridge and valve seat inside the faucet body. Sediment also encourages scale to form on moving parts, which leads to drips and stiff handles. A clean screen keeps grit out of the expensive interior.
Steady pressure and fewer surprises
A clear aerator delivers a predictable stream, so filling a pot or washing vegetables takes the time you expect. It also prevents the sudden spray that soaks your shirt when a partially blocked insert shifts. Small annoyances add up over a year of daily use.
Best practices
The routine below takes about ten minutes once you have the supplies. Most people can do it without tools.
Gather what you need
- Adjustable pliers or a cloth for grip
- White vinegar
- An old toothbrush or a soft brush
- A small bowl
- A clean cloth
White vinegar is the workhorse here. Its mild acid dissolves calcium carbonate scale without damaging metal screens or most plastic inserts.
Remove and disassemble
Wrap a cloth around the aerator to protect the finish, then turn counterclockwise. Most fittings unscrew by hand. Stubborn ones may need pliers, but go gently so you do not crush the housing. Take the parts out in the order they came and set them in the bowl. A phone photo at this stage saves guesswork later.
Soak, scrub, and rinse
Soak the screen and insert in undiluted white vinegar for 30 to 60 minutes. Heavy scale may need a few hours; leave metal parts in longer only if you check them periodically. Scrub the mesh with the toothbrush, working from both sides. Rinse under warm water and hold the screen up to the light to confirm the holes are open.
Between deep cleans, run warm water through the aerator after removing it and give the screen a five-second brush. This clears fresh grit before it hardens into scale.
Reassemble and test
Fit the parts back in the recorded order, hand-tighten the aerator, and run the tap for about ten seconds. Check for leaks around the collar. If water seeps out, add a turn or replace the washer.
Set a schedule
Clean the aerator every three to six months in a typical home. Move to every two months if you have hard water, well water, or older pipes. Bathroom faucets used daily may need the same pace as the kitchen.
Cleaning frequency by water condition
| Water condition | Suggested interval | Main reason |
|---|---|---|
| Soft municipal water | Every 6 months | Light mineral load |
| Hard water | Every 2–3 months | Fast scale buildup |
| Well water or iron | Every 2 months | Sediment and staining |
| Recently repaired mains | After any work | Debris surge |
Notice the pattern: the harder or dirtier the supply, the shorter the interval. When in doubt, inspect rather than wait.
Common mistakes to avoid
Most aerator problems come from a handful of avoidable errors. Each one is easy to correct once you know it.
Using the wrong cleaner
Chlorine bleach and harsh descalers can pit metal screens and discolor plastic inserts. Vinegar is enough for ordinary scale. Skip abrasive powders entirely, since they scratch the mesh and create more places for scale to grip.
Losing the order of parts
The washer, screen, and insert only work in one sequence. Flip a part and the stream sprays. If you forget the order, look up your faucet model online or lay the parts out before you start cleaning.
Over-tightening on reassembly
Aerators seal with a rubber washer, not brute force. Cranking them down can crack the housing or split the washer, which leads to leaks. Hand-tight plus a gentle quarter turn is plenty.
Ignoring the aerator, you cannot unclog
Some fittings seize after years of scale. Forcing them with pliers can break the spout threads. Try a vinegar-soaked cloth wrapped around the joint for an hour before you reach for tools.
Replacing instead of cleaning
People buy new aerators when a good soak would restore the old one. A replacement costs little, but the cleaning habit saves the trip and keeps your flow consistent between purchases.
If the mesh is torn or the insert is cracked, replace the aerator rather than cleaning it. A damaged aerator lets debris through and can spray unpredictably.
Forgetting bathroom and shower fittings
Kitchen taps get all the attention. Bathroom faucets, especially in hard-water homes, clog just as fast. Check every fixture on the same schedule.
FAQ
How often should I clean my faucet aerator?
Every three to six months suits most homes. Shorten the interval to every two months if you have hard water, well water, or older galvanized pipes. Inspect sooner whenever flow drops or the stream sprays unevenly.
Can I clean an aerator without removing it?
Not effectively. Vinegar poured over the outside will not reach the trapped scale behind the screen. You need to unscrew the fitting and soak the parts directly for a proper clean.
How much does a replacement aerator cost?
Most standard aerators sell for a few dollars at hardware stores and home centers. Specialized low-flow or cache models cost more. Cleaning is free, so try that first before buying a replacement.
Is vinegar safe for all aerator parts?
White vinegar is safe for metal screens and most plastic inserts. Avoid it on any part labeled as coated or finished with a sensitive surface. Rinse thoroughly afterward and dry the parts before reassembly.
Why does my faucet still spray after cleaning?
A flipped insert, a missing washer, or a worn screen usually explains it. Check the assembly order against your faucet model. If the parts are damaged, replace the aerator rather than trying to bend them back.
Conclusion
A clean faucet aerator is one of the cheapest pieces of home maintenance you can do. It protects flow, keeps grit out of your faucet’s interior, and reduces the chance of scale and biofilm at the tap. The method is simple: unscrew, soak in vinegar, scrub, rinse, and reassemble. Match your cleaning interval to your water quality, and inspect every fixture, not just the kitchen tap.
Your next step: pick a reminder date for six months from now, or two if your water is hard, and clean every aerator in the house that day. Ten minutes of work keeps the water running the way it should.