Every week, the average household throws away a steady stream of coffee grounds, vegetable peels, and eggshells that could be feeding the soil instead of sitting in a landfill. If you have ever looked at a bag of expensive potting mix and then glanced at your overflowing kitchen scrap bin, the disconnect becomes obvious. Turning those scraps into finished compost is not complicated, but it does require getting a few ratios and conditions right. If you are weighing whether a tumbler unit suits your climate and setup, it helps to read this review of a tumbler tested in Florida’s heat and humidity before you commit. The good news is that the core process works anywhere once you understand the biology behind it.
Quick Answer
To turn kitchen scraps into nutrient-rich compost, combine roughly two to three parts dry, carbon-rich “browns” (leaves, cardboard, sawdust) with one part nitrogen-rich “greens” (fruit and vegetable scraps, coffee grounds), keep the pile as moist as a wrung-out sponge, and turn or aerate it regularly. The pile heats up as microbes break down the material, and within roughly four weeks to six months depending on method, you get dark, crumbly compost. Avoid meat, dairy, oils, and pet waste in most home setups.
Key Takeaways
- The browns-to-greens ratio matters more than any other single factor; aim for about 2:1 to 3:1 by volume, not weight.
- Meat, dairy, fats, and pet waste should stay out of most home compost bins because they attract pests and create odors.
- Moisture and airflow control decomposition speed more than the specific container you choose.
- Kitchen scraps break down faster if you chop them smaller, but whole peels will still decompose given time.
- Finished compost is ready when it no longer resembles its original ingredients and smells earthy, not sour.
What Kitchen Scraps Actually Contribute to Compost
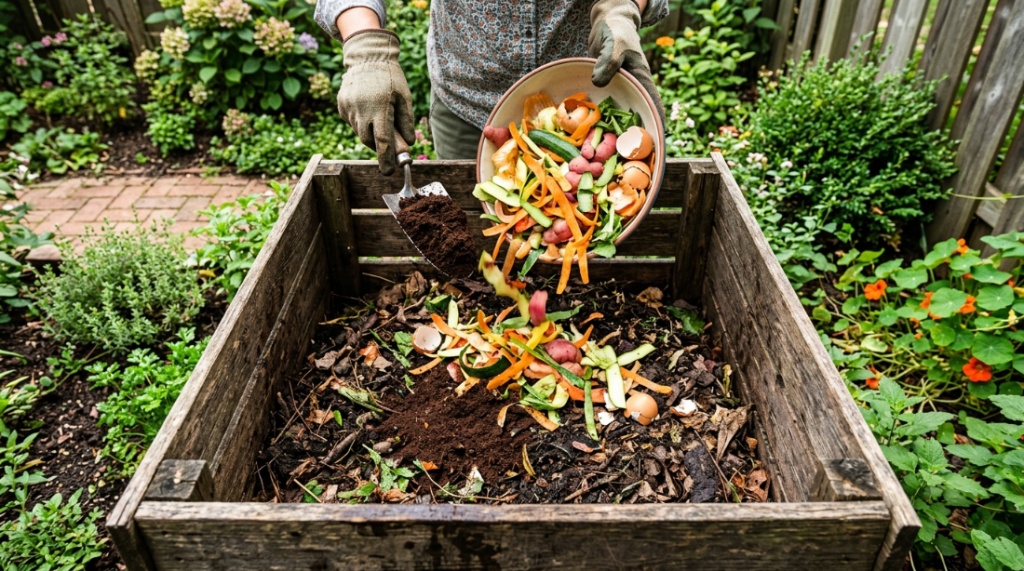
Not all kitchen scraps behave the same way once they hit the pile. Understanding what each type contributes helps you troubleshoot problems before they start.
Fruit and vegetable trimmings, coffee grounds, and tea leaves are “greens” — materials high in nitrogen that fuel microbial activity. They decompose quickly and generate heat, which is why a pile that is mostly greens tends to get hot fast but can turn slimy and smelly if left unchecked.
Eggshells are a special case. They are technically a mineral source of calcium rather than a nitrogen or carbon source, and they break down very slowly unless crushed. Rinsing and crushing them before adding them prevents them from sitting intact for months.
Paper towels, napkins, coffee filters, and unbleached cardboard are “browns” that most people do not think of as kitchen waste, but they balance out the wet scraps. Keep a small container for these near your scrap bin so you can layer them in as you go.
What to Keep Out
Meat, fish, bones, dairy, grease, and cooked food with oil tend to rot rather than compost, produce strong odors, and attract rodents, raccoons, and flies. Pet waste can carry pathogens that survive the composting process and contaminate food crops. Diseased plant material can also spread problems if your pile does not reach high enough temperatures.
The Brown-to-Green Ratio, Explained Simply
The single most common reason a compost pile fails is an imbalance between carbon-rich browns and nitrogen-rich greens. When greens dominate, the pile goes anaerobic — meaning it decomposes without oxygen — and produces that rotten-egg or ammonia smell.
A practical starting point is roughly two to three parts browns to one part greens by volume. You do not need a scale. A simple approach is to add a handful or two of shredded cardboard, dry leaves, or sawdust every time you add a container of kitchen scraps.
Signs your ratio is off:
- Too many greens: Slimy texture, ammonia or sewage smell, flies gathering.
- Too many browns: Pile stays dry and cool, decomposition stalls, nothing seems to break down.
- Balanced: Slight earthy smell, warm interior, moisture like a wrung-out sponge, visible shrinkage over time.
If you only have kitchen scraps and no yard waste, shredded plain cardboard, newspaper, or brown paper bags work well as browns. Avoid glossy paper, which contains coatings that do not break down cleanly.
Choosing a Composting Method That Fits Your Space
There is no single best method — the right choice depends on how much outdoor space you have, how much effort you want to invest, and how quickly you want finished compost.
| Method | Space Needed | Typical Timeline | Effort Level |
|---|---|---|---|
| Open pile or bin | Moderate to large | 3–12 months | Low, but slower |
| Tumbling composter | Small | 4 weeks–3 months | Moderate; needs regular turning |
| Worm bin (vermicomposting) | Very small, indoor-friendly | 2–4 months | Low, but temperature-sensitive |
| Bokashi (fermentation) | Very small, indoor | 2–4 weeks to ferment, then bury | Low, but requires bran inoculant |
Tumblers are popular in urban and suburban yards because they contain the material and speed up turning. Their main limitation is capacity — once full, you either stop adding new material or start a second batch. Worm bins work well indoors but struggle in extreme heat or cold and cannot handle large volumes of citrus or onion scraps, which can harm the worms.
Open piles are the least expensive option and handle larger volumes, but they take longer and are more exposed to weather and animals. If you have the space and patience, they are hard to beat for cost, For more gardening tips, check out our easy repotting soil guide popular among phoenix, az plant owners.
Step-by-Step: From Scrap Bin to Finished Compost
- Collect scraps in a small countertop container. A lidded pail with a charcoal filter reduces odors between trips outside.
- Chop or break down larger pieces. Smaller pieces give microbes more surface area, which speeds decomposition.
- Add scraps to the pile and cover with browns. Burying scraps inside the pile rather than leaving them on top deters flies and pests.
- Maintain moisture. Squeeze a handful of material — it should feel like a damp sponge, not dripping wet and not dusty dry.
- Turn or aerate every one to two weeks. Turning reintroduces oxygen and moves cooler outer material into the hot center.
- Watch the temperature. A healthy pile warms up noticeably within a few days of turning. If it stays cold, you likely need more greens or more moisture.
- Let it cure. Once the material stops heating and looks dark and crumbly, let it sit for a couple of weeks before using it, so it does not burn plant roots.
How Long Does It Take?
Under active management, a tumbler can produce finished compost in roughly four to eight weeks in warm weather. A passive open pile may take six months to a year. Cold climates slow things down considerably in winter, and you may need to simply let the pile sit until spring.
Common Mistakes and How to Fix Them
Most compost problems fall into a few predictable categories, and each has a straightforward correction.
A smelly, slimy pile: This almost always means too many greens and not enough oxygen. Add browns, turn thoroughly, and hold off on adding more kitchen scraps until the smell clears.
A dry pile that never heats up: Add water while turning. Composting is a biological process and the microbes need moisture to function.
Fruit flies or gnats: These usually mean exposed food scraps on the surface. Bury each addition under a layer of browns and keep the lid closed.
Rodents or raccoons: Stop adding meat, dairy, and greasy foods, and make sure your bin is securely closed. In some areas, an enclosed tumbler is the more practical choice than an open pile.
Slow decomposition despite good conditions: Check whether your material is in pieces that are too large, and confirm the pile is not waterlogged. Both stall microbial activity.
Using Finished Compost in the Garden
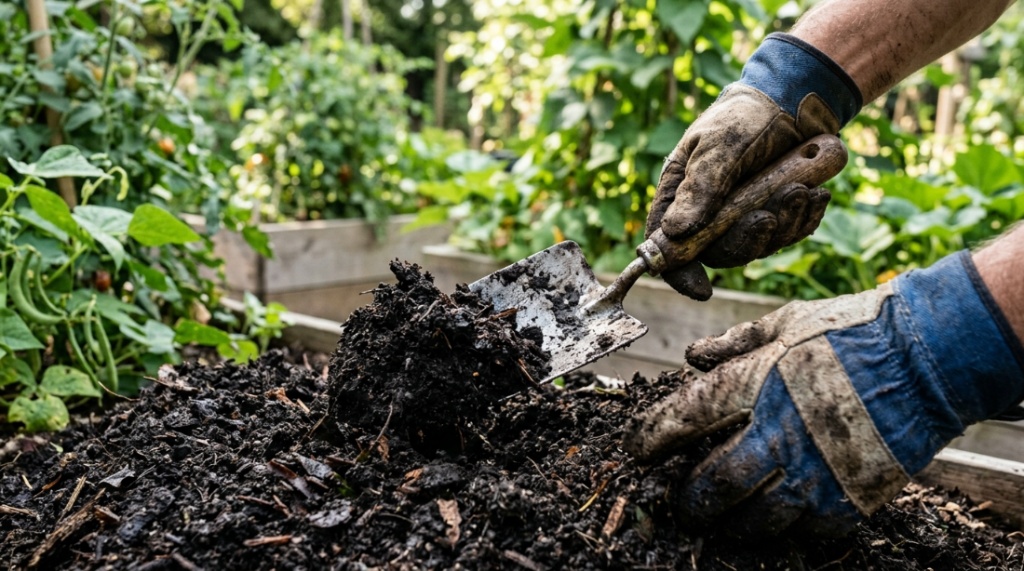
Finished compost is not a complete fertilizer — its nutrient levels vary depending on what went into it — but it improves soil structure, water retention, and microbial life in ways synthetic fertilizers cannot replicate.
Common ways to use it:
- Mix it into planting beds a few inches deep before planting.
- Top-dress established perennials and shrubs with a thin layer.
- Screen it and blend it into potting mixes for containers.
- Steep it in water to make compost tea, though results vary and are less predictable than direct application.
If your compost still contains recognizable pieces of eggshell or sticks, that is fine for garden use — it will continue breaking down in the soil. For potting mixes or seed starting, screen it first so the texture stays fine, For more gardening tips, check out our easy repotting soil guide popular among phoenix, az plant owners.
Frequently Asked Questions
Can I compost citrus peels and onion scraps?
Yes, in a traditional compost pile they break down fine. In worm bins, use them sparingly, since the oils can irritate worms. In small amounts, they are not a problem for most setups.
How often should I turn my compost?
Every one to two weeks is a reasonable balance for most home composters. Turning more often speeds things up but requires more effort; turning less often still works, just more slowly.
Why does my compost smell like ammonia?
That smell indicates excess nitrogen from too many greens. Add browns like shredded cardboard or dry leaves, turn the pile to introduce oxygen, and the smell should fade within a few days.
Do I need to add a compost starter or accelerator?
Usually not. The microbes that drive decomposition are already present in soil and on the surface of scraps. A starter may help a pile that has stalled, but it is rarely necessary.
Can I compost in winter?
Yes, but activity slows dramatically in cold temperatures. Keep adding material and turn occasionally on mild days. The pile will resume active decomposition when temperatures rise.
Is compost from kitchen scraps safe for vegetable gardens?
Yes, provided you excluded meat, dairy, pet waste, and diseased plant material. Pathogen risk is low in properly managed piles, and finished compost is widely used on food crops.
Conclusion
Turning kitchen scraps into compost comes down to three things: the right balance of browns and greens, consistent moisture, and enough airflow. Get those right and the process largely runs itself, converting waste that would otherwise go to a landfill into a material that genuinely improves your soil. Start small, adjust as you notice smells or stalled decomposition, and give it a full season before judging the results. Once you have a batch of finished compost in hand, the effort tends to justify itself.